AzamSharp
Building a Rating View in SwiftUI
In this post, you will learn how to build a Rating view in SwiftUI. Rating view will allow you to select a star rating and get access to the integer value of the rating.
Let’s first start by displaying stars in our RatingView control.
struct RatingView: View {

    var body: some View {
        HStack {
            ForEach(1...5, id: \.self) { index in
                Image(systemName: "star.fill")
                    .foregroundColor(.orange)
            }
        }
    }
}
We used ForEach to run a loop and construct multiple Image views. All the images are inside the HStack control. The output is shown below:

Next, we need to make sure that the rating is tappable. We attach the onTapGesture modifier on the Image as shown below:
struct RatingView: View {

    @Binding var rating: Int?

    var body: some View {
        HStack {
            ForEach(1...5, id: \.self) { index in

                Image(systemName: "star.fill")
                    .foregroundColor(.orange)
                    .onTapGesture(perform: {
                        self.rating = index
                    })
            }
        }
    }
}
One important thing to notice is that we are passing the rating as a @Binding express. This means that the parent view can pass in a @State object and when we change the value of rating within the RatingView control, it will be reflected in the parent view.
At this point, our rating is not going to reflect selected vs non-selected ratings. This is taken care of in the following code:
import SwiftUI

struct RatingView: View {

    @Binding var rating: Int?

    private func starType(index: Int) -> String {

        if let rating = self.rating {
            return index <= rating ? "star.fill" : "star"
        } else {
            return "star"
        }

    }

    var body: some View {
        HStack {
            ForEach(1...5, id: \.self) { index in

                Image(systemName: self.starType(index: index))
                    .foregroundColor(Color.orange)
                    .onTapGesture {
                        self.rating = index
                }
            }
        }
    }
}
The starType function will make sure to get the correct star. This will enable us to display the filled vs non-filled stars.
Finally, inside the ContentView we can use our new RatingView control as shown below:
import SwiftUI

struct ContentView: View {

    @State private var rating: Int?

    var body: some View {
        VStack {
            RatingView(rating: $rating)
             Text(rating != nil ? "You rating: \(rating!)" : "")
        }
    }
}
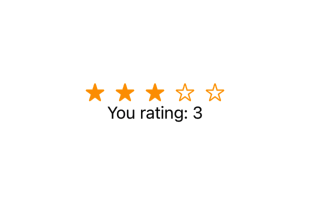
The result is shown below:
I hope you have enjoyed the article, if you want to support my work then please consider checking out my Udemy courses below.