AzamSharp
StoreKit Subscriptions: A Practical Guide
Part 5: Handling Purchases
In the previous article, we focused on displaying StoreKit products inside the app and allowing users to select a subscription option such as monthly or annual. At that point, everything was visually in place, but nothing was actually being purchased yet.
In this article, we will take the next logical step and walk through how to perform purchases using StoreKit. This is where the real transaction flow begins and where many developers start to feel overwhelmed. The good news is that initiating a purchase is surprisingly simple. The complexity comes from handling all the possible outcomes correctly and keeping your app’s state in sync with the App Store.
Let’s start by implementing the purchase flow itself.
Implementing the Purchase Function
StoreKit provides a built-in API for initiating purchases. At its simplest, performing a purchase is just a single function call. However, behind that call, there are many scenarios you need to handle such as pending transactions, user cancellations, verification failures, and successful purchases.
We will address those scenarios step by step. First, let’s implement the most basic version of a purchase function.
Inside your Store class, add the following method:
func purchase(_ product: Product) async throws -> PurchaseOutcome {
        let result = try await product.purchase()
}
Calling product.purchase() presents Apple’s purchase confirmation sheet to the user. This sheet is fully managed by the system and handles authentication, payment confirmation, and user consent.
You can trigger this purchase function from a call-to-action button in your UI, as shown below:
if let selectedProduct {
                Button {
                    // action
                    Task { try await store.purchase(selectedProduct) }
                } label: {
                    Text(callToActionButtonTitle)
                        .frame(maxWidth: .infinity, alignment: .center)
                }.buttonStyle(.borderedProminent)

            }
When the app is running and the user taps the Start Growing button, a modal sheet slides up asking them to confirm the purchase. This is the standard StoreKit purchase UI and cannot be customized.
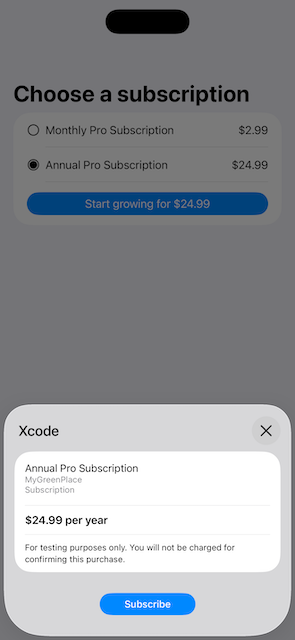
This purchase modal is shown only for testing when using a StoreKit configuration file. No real credit or debit card is charged during development.
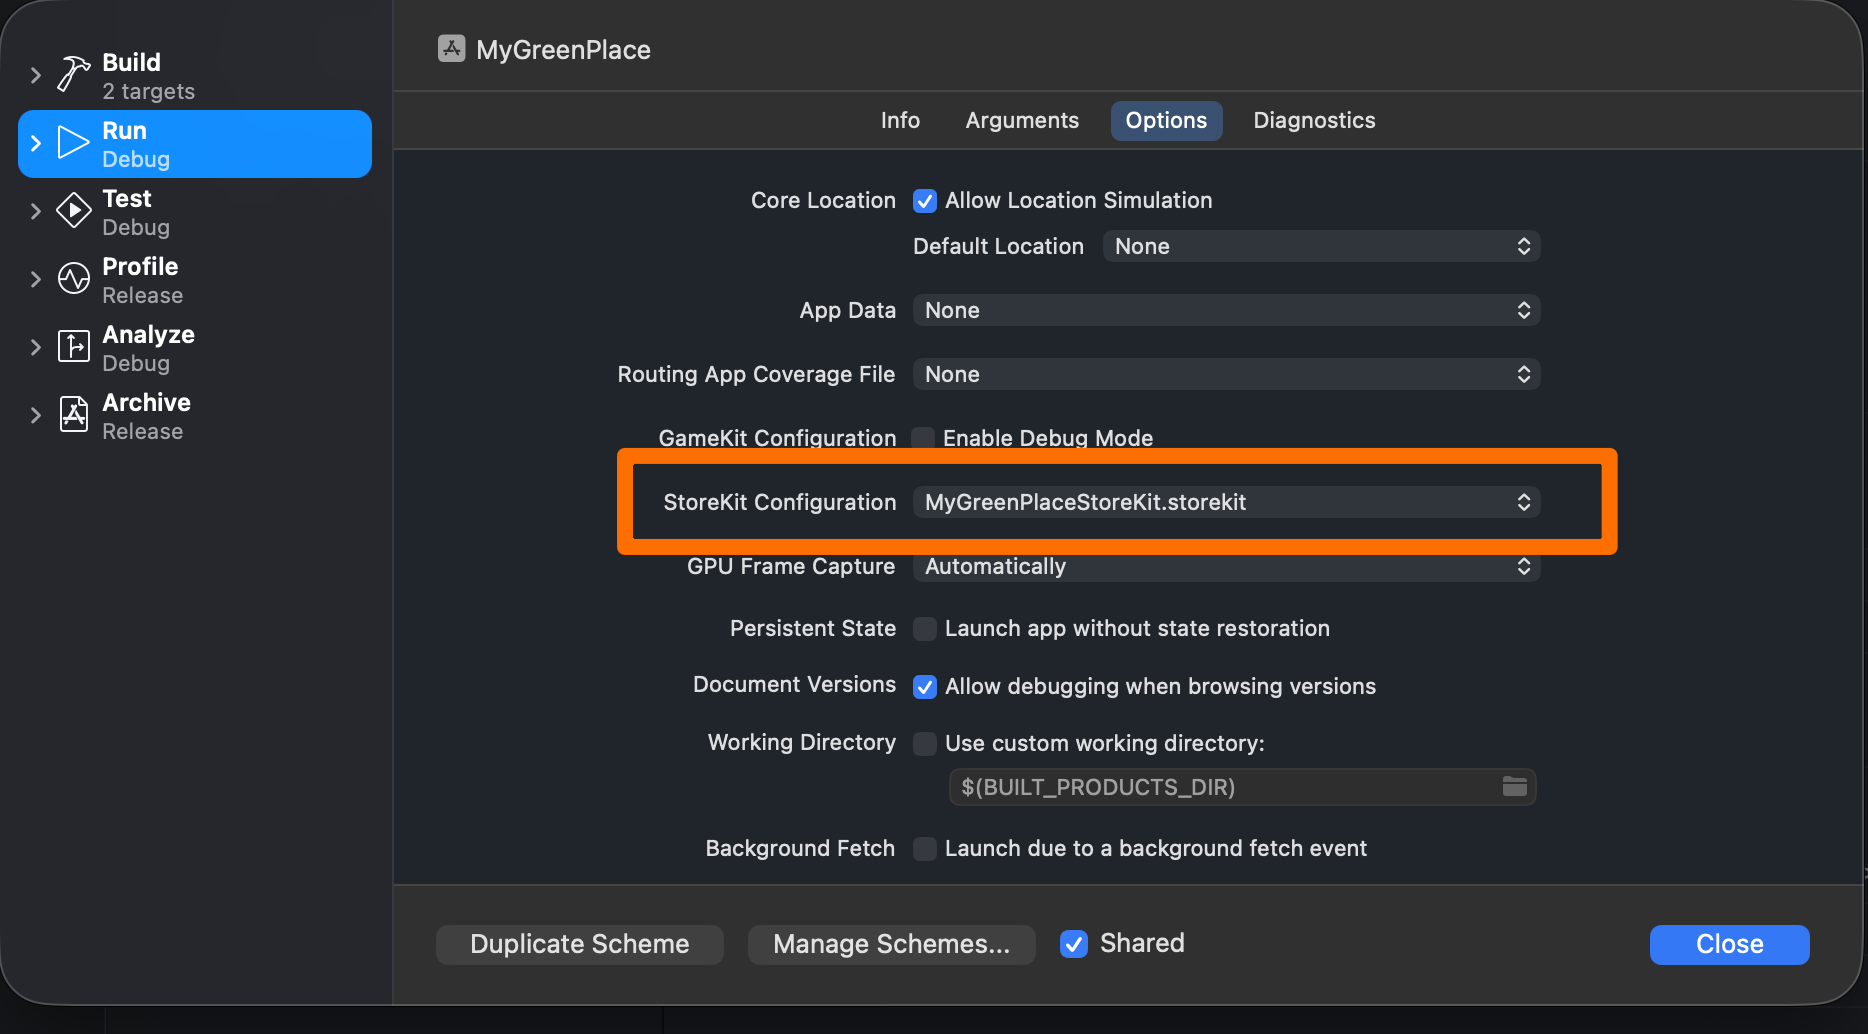
For the purchase flow to work correctly in development, make sure you have configured your StoreKit configuration file in the active scheme:
At this point, you are already capable of initiating real StoreKit purchases with a single API call. However, simply calling product.purchase() is not enough. We need to handle what happens after the user interacts with the purchase sheet.
Handling Purchase Outcomes
When you call:
let result = try await product.purchase()
StoreKit returns a Product.PurchaseResult. This result can represent several different outcomes depending on what the user does and how the transaction proceeds.
Rather than exposing Product.PurchaseResult directly to the rest of the app, we will define our own abstraction called PurchaseOutcome. This gives us more control and makes the purchase flow easier to reason about and extend in the future.
Here is the PurchaseOutcome type:
enum PurchaseOutcome {
        case success
        case pending
        case userCancelled
        case unverified(String)
        case failed(Error)
    }
This custom type allows us to express purchase states in a way that matches how the app actually behaves.
Now let’s update the purchase function to return a PurchaseOutcome instead of just initiating the purchase:
func purchase(_ product: Product) async throws -> PurchaseOutcome {
        let result = try await product.purchase()
        switch result {
        case .pending:
            return .pending
        case .success(let verification):
            switch verification {
            case .unverified(_, let error):
                return .unverified(error.localizedDescription)
            case .verified(let tx):
                await tx.finish()
                await refreshEntitlements()
                return .success
            }
        case .userCancelled:
            return .userCancelled
        @unknown default:
            return .failed(NSError(domain: "Purchase", code: -1))
        }
    }
Here’s what is happening in this function:
- If the transaction is pending, the user has not completed the purchase yet. This commonly happens with parental approval or delayed payment methods.
- If the purchase succeeds, StoreKit provides a verification result.
- If the transaction is unverified, we return an error and do not unlock any features.
- If the transaction is verified, we finish the transaction by calling
tx.finish()and then refresh the user’s entitlements. - If the user cancels the purchase, we return
.userCancelledand leave the app state unchanged.
Calling tx.finish() is critical. It tells StoreKit that your app has successfully handled the transaction. Forgetting to finish transactions can cause repeated purchase prompts and inconsistent behavior.
Refreshing User Entitlements
Once a purchase is completed, your app needs a reliable way to determine what the user currently owns. This is the responsibility of the refreshEntitlements function.
This function is one of the most important parts of the entire subscription system.
func refreshEntitlements() async {
        var newActive: Set<Transaction> = []
        var hasPro = false

        for await ent in Transaction.currentEntitlements {

            if case .verified(let tx) = ent {
                newActive.insert(tx)
                if productIds.contains(tx.productID) {
                    hasPro = true
                }
            }
        }

        activeTransactions = newActive
        isProUser = hasPro
    }
The refreshEntitlements function iterates over all of the user’s current entitlements and verifies each one. If a transaction is verified and its product identifier matches one of the subscription products offered by the app, the user is marked as a Pro user.
This approach ensures that your app’s state is always derived from the App Store’s source of truth, rather than relying on local flags or assumptions.
You may still see the warning:
Making a purchase without listening for transaction updates risks missing successful purchases. Create a Task to iterate Transaction.updates at launch.We will address this properly in a future article.
Conclusion
Handling purchases with StoreKit is simpler than it first appears, but only if you approach it with the right structure. Initiating a purchase is just one line of code, but handling outcomes, verification, and entitlements correctly is what separates a reliable subscription system from a fragile one.
In this article, we implemented a complete purchase flow that:
- Initiates purchases using StoreKit
- Handles all major purchase outcomes
- Verifies transactions securely
- Updates user entitlements based on verified purchases
With this foundation in place, your app can now safely unlock premium features and respond correctly to real-world purchase scenarios.
In the next article, we will tackle transaction updates and restoration, ensuring your app stays in sync with the App Store even when purchases happen outside the app or across multiple devices.