AzamSharp
What’s New in SwiftData for iOS 27
WWDC is always an exciting time for Swift developers. Every year Apple introduces new APIs, refines existing frameworks, and occasionally removes some of the rough edges that developers have been working around for months.
SwiftData is no exception.
Since its introduction, SwiftData has provided a modern and approachable way to persist data in SwiftUI applications. While the framework has been productive for many common scenarios, developers quickly discovered areas where it felt incomplete. Filtering on enums required workarounds. Grouping data into sections was not supported. Building dynamic predicates could become cumbersome. Observing store changes outside of SwiftUI views was difficult. And certain framework types simply could not be persisted without custom solutions.
In iOS 27, Apple addressed many of these pain points.
The new release introduces support for enum predicates, sectioned queries, compound predicates, the new .codable attribute, and ResultsObserver. Individually, each feature solves a specific problem. Together, they make SwiftData more capable and more pleasant to use in real-world applications.
In this article, we will explore some of the most important SwiftData improvements introduced in iOS 27 and examine how they can simplify the code you write every day.

Table of Contents
- Predicate with Enums
- Grouping Data into Sections
- Compound Queries
- The .codable Attribute
- ResultsObserver - Observing Data Outside Views
- HistoryObserver - Syncing Data with Custom Backend
Predicate with Enums
Prior to iOS 27, filtering SwiftData models using enums was not a pleasant experience. Even if your model contained an enum property, you often had to persist the enum’s raw value separately in the database and then build your predicates against that value.
Fortunately, this limitation has been removed in iOS 27. SwiftData predicates can now work directly with enum values, resulting in cleaner models and simpler query code.
Source: Axel Le Pennec Tweet
Consider a personal finance application where each expense is categorized by an ExpenseType.
enum ExpenseType: String, Codable, CaseIterable, Identifiable {
    case all
    case credit
    case debit
    case cash

    var id: Self {
        self
    }

    var title: String {
        switch self {
        case .all:
            return "All"
        case .credit:
            return "Credit"
        case .debit:
            return "Debit"
        case .cash:
            return "Cash"
        }
    }
}
Suppose we want to display only expenses matching a selected expense type. This can now be accomplished directly using a predicate.
struct ExpenseListScreen: View {

    let expenseType: ExpenseType
    @Query private var expenses: [Expense]

    init(expenseType: ExpenseType) {
        self.expenseType = expenseType

        switch self.expenseType {
        case .all:
            _expenses = Query()

        case .credit, .debit, .cash:
            _expenses = Query(filter: #Predicate<Expense> {
                $0.expenseType == expenseType
            })
        }
    }

    var body: some View {
        List(expenses) { expense in
            HStack {
                Text(expense.name)
                Spacer()
                Text(expense.expenseType.title)
            }
        }
    }
}
The implementation is straightforward. If the user selects All, we create a default query that returns every expense. Otherwise, we construct a predicate that compares the expense’s expenseType property against the selected enum value.
#Predicate<Expense> {
    $0.expenseType == expenseType
}
Prior to iOS 27, this comparison would typically require persisting the raw value of the enum and filtering against that value instead. Now the predicate can work directly with the enum itself, which keeps the model cleaner and reduces duplication.
This might seem like a small improvement, but it has a noticeable impact on the overall design of your models. You no longer need additional properties whose sole purpose is to support filtering. Instead, you can model your data naturally and allow SwiftData to handle the translation between your enum values and the underlying database representation.
As with many of the improvements in iOS 27, the result is not necessarily new functionality but a much cleaner developer experience.
Grouping Data into Sections
In iOS 27, Apple introduced support for grouping query results into sections using the sectionBy parameter of the @Query macro. At first glance, you might wonder why this feature is needed. After all, if you already have a parent-child relationship, couldn’t you simply loop through the parent collection and then display the child items?
You certainly can, but that approach requires fetching the parent models and navigating their relationships. Sometimes you don’t care about the parent models at all. You simply have a collection of child records and want them grouped by a particular value.
A good example is a personal finance application. Imagine you have a collection of expenses and you want to display them grouped by budget.
Take a look at the implementation below:
@Model
class Expense {
    var name: String
    var amount: Double
    var budget: Budget?
    var budgetName: String = ""

    init(name: String, amount: Double, budget: Budget? = nil) {
        self.name = name
        self.amount = amount
        self.budgetName = budget?.name ?? "Uncategorized"
    }
}

struct ContentView: View {

    @Query(sort: \Expense.name, sectionBy: \Expense.budgetName) var expenses: [Expense]

    var body: some View {
        List(_expenses.sections) { section in
            Section(section.id) {
                ForEach(section) { expense in
                    Text(expense.name)
                }
            }
        }
    }
}
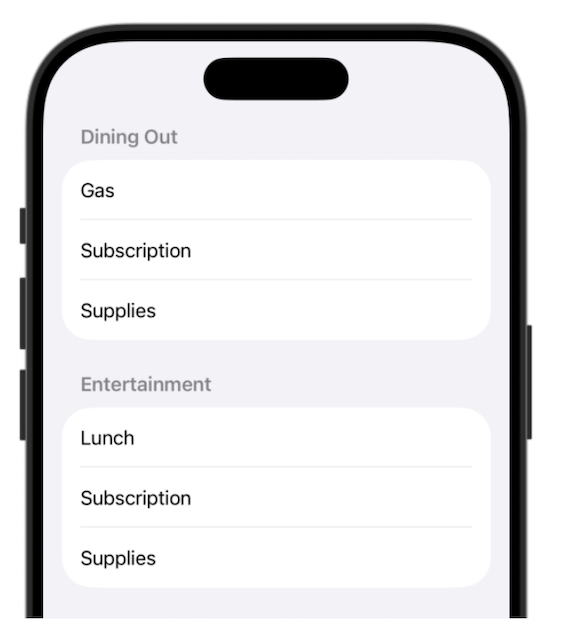
The result is a list of expenses grouped by budget name.
Let’s break down how this works.
The grouping is performed using the sectionBy parameter on @Query. The parameter accepts a key path to a persisted String property.
In this example, we want to group expenses by budget name, so we pass \Expense.budgetName. Once the query executes, SwiftData automatically creates sections for us. These sections can be accessed through the _expenses.sections property.
List(_expenses.sections) { section in
    Section(section.id) {
        ForEach(section) { expense in
            Text(expense.name)
        }
    }
}
The outer loop iterates through each section. The section identifier is the value of the property specified in sectionBy, which in our case is the budget name. The inner loop iterates through all expenses that belong to that section.
Overall, the API is simple and works well, but there is one limitation worth mentioning.
Notice that we had to introduce a dedicated budgetName property on the Expense model. This feels somewhat redundant because the expense already has access to the budget name through its relationship: expense.budget?.name
Unfortunately, the sectionBy parameter currently requires a persisted property. Computed properties and transient properties do not work because sectioning happens at the database level. The value used for grouping must exist in the underlying store.
Ideally, I would like the following code to work:
@Query(
    sort: \Expense.name,
    sectionBy: \Expense.budget?.name
)

var expenses: [Expense]
At the time of writing, this is not supported and results in compiler errors. Perhaps future versions of SwiftData will allow sectioning based on relationship properties, but for now you will need to store the grouping value directly on the model.
This is one of the tradeoffs of the current implementation. The feature is useful and easy to use, but it may require introducing additional persisted properties solely for grouping purposes.
Compound Queries
Prior to iOS 27, combining multiple SwiftData predicates often required creating a single predicate containing all of your conditions. While this approach worked, it could become difficult to manage as the number of filters increased. In iOS 27, Apple introduced support for compound predicates through the Predicate(all:) and Predicate(any:) initializers, making it easier to build queries dynamically based on user input.
Consider a scenario where you want to allow users to search for books by name while also filtering whether the book is a bestseller. Since both filters are optional and driven by user input, it makes sense to create separate predicates and combine them into a single query.
The implementation is shown below:
struct BooksListView: View {

    let search: String
    let isBestSeller: Bool

    @Query private var books: [Book]

    init(search: String, isBestSeller: Bool) {
        self.search = search
        self.isBestSeller = isBestSeller

        if search.isEmpty {
            _books = Query()
        } else {

            let searchPredicate = #Predicate<Book> {
                $0.name.localizedStandardContains(search)
            }

            let bestSellerPredicate = #Predicate<Book> {
                $0.isBestSeller == isBestSeller
            }

            _books = Query(filter: Predicate(any: [searchPredicate, bestSellerPredicate]))
        }

    }

    var body: some View {
        List(books) { book in
            Text(book.name)
        }
    }
}
Before creating the predicates, the code checks whether the search string is empty. If it is, a default Query is created, which returns all books. Otherwise, two separate predicates are constructed based on the user’s search text and bestseller selection.
The most important line is the following:
_books = Query(filter: Predicate(all: [searchPredicate, bestSellerPredicate]))
The all option performs a logical AND operation. This means every predicate in the collection must evaluate to true for a book to be included in the results.
If you replace all with any:
_books = Query(filter: Predicate(any: [searchPredicate, bestSellerPredicate]))
then a logical OR operation is performed. In that case, only one of the predicates must be satisfied for the book to appear in the results.
One of the biggest advantages of compound predicates is that they can be built incrementally. You can create small, focused predicates based on user selections and then combine them as needed. This approach keeps your filtering logic organized and makes it easier to support more advanced search screens with multiple filter options.
The .codable Attribute
One of the nice features of SwiftData is its ability to persist value types. If your model contains a nested struct or enum, SwiftData can usually persist it without any additional work, as long as the value conforms to the Codable protocol.
Take a look at the example below, where a User model contains a nested Location struct.
@Model
class User {
    var name: String
    var age: Int

    var location: Location

    init(name: String, age: Int, location: Location) {
        self.name = name
        self.age = age
        self.location = location
    }

    convenience init(name: String, age: Int, latitude: Double, longitude: Double) {
        self.init(
            name: name,
            age: age,
            location: Location(latitude: latitude, longitude: longitude)
        )
    }

    struct Location: Codable {
        let latitude: Double
        let longitude: Double
    }
}
Saving a user is straightforward:
let user = User(
    name: "John Doe",
    age: 34,
    latitude: 37.3349,
    longitude: -122.0090
)

modelContext.insert(user)
What is interesting happens behind the scenes. If you inspect the generated database schema, you will notice that SwiftData does not store the Location struct as a blob. Instead, it breaks the struct apart and stores each property in its own column.
CREATE TABLE ZUSER ( Z_PK INTEGER PRIMARY KEY, Z_ENT INTEGER, Z_OPT INTEGER, ZAGE INTEGER, ZLATITUDE FLOAT, ZLONGITUDE FLOAT, ZNAME VARCHAR );
This is great news. Since latitude and longitude are stored as individual columns, they can participate in sorting and filtering operations. SwiftData understands the structure and can translate predicates directly into SQL queries.
Now let’s look at a different example. Suppose we want to store a favorite place. In addition to the name, we also want to persist an MKMapItem.Identifier.
@Model
class FavoritePlace {
    var name: String

    var mapItemIdentifier: MKMapItem.Identifier?

    init(name: String, mapItemIdentifier: MKMapItem.Identifier?) {
        self.name = name
        self.mapItemIdentifier = mapItemIdentifier
    }
}
The code compiles without any issues.
let identifier = // get the identifier from MapKit

let place = FavoritePlace(name: "Apple Campus", mapItemIdentifier: identifier)
    modelContext.insert(place)
Unfortunately, the application crashes as soon as SwiftData attempts to create the model container.
ContentView()
    .modelContainer(for: [User.self, FavoritePlace.self])
The error message looks something like this:
SwiftData/SchemaProperty.swift:523: Fatal error: Class property within Persisted Struct/Enum is not supported: MKMapItemIdentifier
At first glance, the error can be confusing. The problem is that SwiftData is trying to inspect the type and break it apart into pieces, just like it did with the Location struct.
Unfortunately, one of those pieces is backed by a class type, and SwiftData cannot represent it as a collection of database columns.
Prior to iOS 27, there was no clean solution to this problem.
In iOS 27, Apple introduced a new .codable option for the @Attribute macro.
@Attribute(.codable)
var mapItemIdentifier: MKMapItem.Identifier
This tells SwiftData to stop trying to understand the internal structure of the value. Instead, SwiftData serializes the value and stores it as a blob. Run the application again and everything works as expected. If you inspect the schema, you will notice that the identifier is now stored as a BLOB.
CREATE TABLE ZFAVORITEPLACE ( Z_PK INTEGER PRIMARY KEY, Z_ENT INTEGER, Z_OPT INTEGER, ZNAME VARCHAR, ZMAPITEMIDENTIFIER BLOB );
This solves the persistence problem, but it comes with an important tradeoff.
Since the value is stored as a blob, SwiftData can no longer inspect its contents. That means the value cannot participate in filtering, sorting, or predicates. As far as the database is concerned, it is simply a chunk of serialized data.
This leads to a useful rule of thumb.
If you own the type and want to query against its values, make the type conform to Codable and let SwiftData break it apart into individual columns whenever possible.
If you do not own the type, or you simply need to persist it without filtering or sorting on its contents, the new .codable attribute is often the better choice.
The introduction of .codable fills an important gap in SwiftData. It allows you to persist complex framework types that SwiftData cannot naturally decompose, while still keeping your models clean and expressive.
ResultsObserver - Observing Data Outside Views
One of the biggest limitations of SwiftData has been that changes to the store could only be observed from inside SwiftUI views. This is usually accomplished using the @Query macro, which automatically refreshes the view whenever the underlying data changes.
For most applications, this works great. The view displays data, the data changes, and SwiftUI updates the UI automatically.
But there are situations where observing data from a view is not enough.
Consider a personal finance application. You may want to display a summary showing the total budget, total spending, remaining balance, and a list of overspent budgets. Technically, you can calculate all of these values directly in the view. The problem is that this logic is not really presentation logic. It is business logic. You may want to reuse it across multiple screens, and more importantly, you probably want to write tests against it.
A better approach is to move that logic into a dedicated type responsible for maintaining the summary.
In iOS 27, Apple introduced ResultsObserver, which allows developers to observe changes to the store outside of SwiftUI views and from within @Observable types. Before we continue, it is important to understand what this feature is not.
ResultsObserver is not an invitation to move all of your logic into @Observable classes. Presentation logic can stay in the view. Logic related to a single model should remain on the model itself. But sometimes you need logic that depends on a collection of models or you need to access the SwiftData store changes inside other @Observable classes. That logic does not naturally belong to a view or a single model. These are the scenarios where ResultsObserver can be a good fit.
Our budget summary example is a perfect candidate for ResultsObserver.
Take a look at the implementation below:
@Observable
final class BudgetSummaryStore {

    private let observer: ResultsObserver<Budget, Never>?
    @ObservationIgnored private var token: ObservationTracking.Token?

    var totalBudget: Double = 0
    var totalSpent: Double = 0
    var remaining: Double = 0
    var overspentBudgets: [Budget] = []

    init(modelContext: ModelContext) throws {
        observer = try ResultsObserver(modelContext: modelContext)

        token = withContinuousObservation(options: [.didSet]) { [weak self] event in
            self?.updateSummary()
        }

    }

    private func updateSummary() {
        guard let observer else { return }

        let budgets = observer.results
        totalBudget = budgets.reduce(0) { $0 + $1.limit }
        totalSpent = budgets.reduce(0) { result, budget in
            result + budget.expenses.reduce(0) { $0 + $1.amount }
        }
        remaining = totalBudget - totalSpent
        overspentBudgets = budgets.filter { budget in
            spentAmount(for: budget) > budget.limit
        }
    }

    private func spentAmount(for budget: Budget) -> Double {
        budget.expenses.reduce(0) { $0 + $1.amount }
    }
}
The first thing to notice is the use of ResultsObserver.
private let observer: ResultsObserver<Budget, Never>?
The first generic parameter specifies the model being observed. In our case, we are observing Budget records. The second generic parameter represents the section identifier type. Since we are not using sections, we pass Never.
Inside the initializer, we create the observer and establish a continuous observation.
token = withContinuousObservation(options: [.didSet]) { [weak self] event in
    self?.updateSummary()
}
The .didSet option means the observation closure is executed after tracked values change.
It is also important to hold on to the token returned by withContinuousObservation. If the token is released, the observation stops and updates will no longer be delivered. The next question is: what exactly is being tracked? The answer can be found inside the updateSummary() function.
let budgets = observer.results
Since we access observer.results, changes to the observed result set are tracked. This includes budgets being inserted, deleted, or updated.
But the tracking does not stop there. Notice that the summary calculation also accesses:
budget.limit
budget.expenses
expense.amount
Since those values participate in the calculation, they are tracked as well. If a budget limit changes, the summary is recalculated. If an expense is added or removed, the summary is recalculated. If an existing expense amount changes, the summary is recalculated.
This is one of the most powerful aspects of Swift’s Observation framework. Rather than manually registering dependencies, the framework automatically tracks the values accessed while the observation is being established.
ResultsObserver is a welcome addition to SwiftData because it fills an important gap. It allows services and stores to react to changes in the database without requiring a SwiftUI view.
Some examples include:
- A BudgetSummaryStore that calculates dashboard metrics.
- A LocationManager that reacts to location-based records.
- A MapCameraController that adjusts map bounds based on stored locations.
In all of these cases, the logic does not naturally belong inside a view, but it still needs access to changing data. Once the BudgetSummaryStore has been created, it can be injected into the environment and shared throughout the application.
@main
struct ResultsObserverInSwiftDataApp: App {

    let container: ModelContainer
    @State private var budgetSummaryStore: BudgetSummaryStore

    init() {
        container = try! ModelContainer(
            for: Budget.self,
            configurations: ModelConfiguration(isStoredInMemoryOnly: false)
        )

        budgetSummaryStore = try! BudgetSummaryStore(
            modelContext: container.mainContext
        )
    }

    var body: some Scene {
        WindowGroup {
            ContentView()
        }
        .modelContainer(container)
        .environment(budgetSummaryStore)
    }
}
Views can then access the summary store directly from the environment and display the calculated values without needing to know how those values were produced. ResultsObserver does not replace @Query. In most situations, @Query remains the simplest and most natural way to display data in SwiftUI. But when you need to react to store changes outside of a view and maintain derived state, ResultsObserver provides a clean and powerful solution.
HistoryObserver - Synchronizing SwiftData with a Custom Backend
Introduced in iOS 27, HistoryObserver makes it easier to synchronize a SwiftData store with a custom backend. One of the challenges of building applications backed by a server is figuring out what has changed since the last synchronization. You could fetch all of the records and send them to the server every time a sync runs, but that approach does not scale very well as your data grows.
In most cases, you only want to synchronize the records that have changed.
This is where HistoryObserver comes in. It allows your application to monitor changes occurring in the SwiftData store and inspect the transactions that were committed. Instead of only giving you the current state of your models, it provides access to the inserts, updates, and deletes that occurred over time.
This information is extremely valuable when building a synchronization pipeline. When a user creates, updates, or deletes data locally, you can inspect the changes and queue only those records for synchronization. This results in a much more efficient solution compared to repeatedly scanning the entire database.
Consider a home inventory application that stores information about rooms in a house. Whenever a new room is added, we would like to automatically queue that room for synchronization with a remote server.
@Model
class Room {

    var name: String
    var area: Double

    init(name: String, area: Double) {
        self.name = name
        self.area = area
    }

}
The Room model is intentionally simple. It represents a room in the house and stores the name of the room along with its area. Next, we can create a sync manager that observes changes to the SwiftData store.
@Observable
class RoomSyncManager {

    private var observer: HistoryObserver?
    private var lastToken: DefaultHistoryToken?

    @ObservationIgnored
    private var token: ObservationTracking.Token?

    func start(container: ModelContainer) throws {
        observer = try HistoryObserver(
            observedModels: [Room.self],
            modelContainer: container
        )

        token = withContinuousObservation(options: .didSet) { [weak self] event in
            _ = self?.observer?.eventCounter
            self?.processChanges(container: container)
        }
    }

    private func processChanges(container: ModelContainer) {
        let modelContext = container.mainContext

        let descriptor: HistoryDescriptor<DefaultHistoryTransaction>

        if let lastToken {
            descriptor = HistoryDescriptor<DefaultHistoryTransaction>(
                predicate: #Predicate { transaction in
                    transaction.token > lastToken
                }
            )
        } else {
            descriptor = HistoryDescriptor<DefaultHistoryTransaction>()
        }

        do {
            let history = try modelContext.fetchHistory(descriptor)

            for transaction in history {
                for change in transaction.changes {
                    switch change {
                    case .insert(let insert as DefaultHistoryInsert<Room>):
                        if let room = modelContext.model(
                            for: insert.changedPersistentIdentifier
                        ) as? Room {
                            queueRoomForSync(room)
                        }

                    case .update(let update as DefaultHistoryUpdate<Room>):
                        if let room = modelContext.model(
                            for: update.changedPersistentIdentifier
                        ) as? Room {
                            queueRoomForSync(room)
                        }

                    case .delete(let delete as DefaultHistoryDelete<Room>):
                        queueRoomDeleteForSync(delete.changedPersistentIdentifier)

                    default:
                        break
                    }
                }
            }

            if let latestToken = history.last?.token {
                lastToken = latestToken
            }
        } catch {
            print(error.localizedDescription)
        }
    }

    private func queueRoomForSync(_ room: Room) {
        print("Queue room for sync")
        print(room.name, room.area)

        // In a real application, this is where you can create
        // a sync job and send it to your backend.
    }

    private func queueRoomDeleteForSync(_ id: PersistentIdentifier) {
        print("Queue room delete for sync")
        print(id)

        // In a real application, this is where you can notify
        // your backend that the local record was deleted.
    }
}
The first thing to notice is the HistoryObserver.
private var observer: HistoryObserver?
Inside the start function, we create the observer and tell it which models we want to observe.
observer = try HistoryObserver( observedModels: [Room.self], modelContainer: container)
In this example, we are only observing changes for the Room model. If your application needs to observe multiple models, you can pass additional model types to the observedModels array.
Next, we establish continuous observation.
token = withContinuousObservation(options: .didSet) { [weak self] event in
    guard let self else { return }

    // Accessing eventCounter causes the observation
    // to be re-triggered whenever new history events occur.
    _ = observer?.eventCounter

    processChanges(container: container)
}
The important line is this one:
_ = self?.observer?.eventCounter
Accessing eventCounter allows the observation system to track changes reported by the HistoryObserver. When the store changes, the observation fires and processChanges is called.
Just like other uses of withContinuousObservation, it is important to keep a strong reference to the returned token. If the token is released, the observation stops.
Inside processChanges, we fetch the persistent history from the model context.
let history = try modelContext.fetchHistory(descriptor)
The history contains transactions, and each transaction contains changes. Those changes can represent inserts, updates, or deletes.
for transaction in history {
    for change in transaction.changes {
        switch change {
        case .insert(let insert as DefaultHistoryInsert<Room>):
            handleInsert(insert)

        case .update(let update as DefaultHistoryUpdate<Room>):
            handleUpdate(update)

        case .delete(let delete as DefaultHistoryDelete<Room>):
            handleDelete(delete)

        default:
            break
        }
    }
}
For inserted and updated records, we can use the changed persistent identifier to load the model from the context.
if let room = modelContext.model(
    for: insert.changedPersistentIdentifier
) as? Room {
    queueRoomForSync(room)
}
This allows us to queue the actual room for synchronization with the backend. Deletes are a little different. When a record has been deleted, the model may no longer be available in the store. In that case, you usually send the persistent identifier or your own server-side identifier to the backend so it can delete the matching record remotely.
Finally, we store the latest history token.
if let latestToken = history.last?.token {
    lastToken = latestToken
}
The token is important because it allows the sync manager to continue from where it left off. Without a token, you may end up processing the same transactions again.
In this example, lastToken is stored in memory only. In a real application, you would usually persist this token somewhere safe so the app can resume synchronization after it restarts.
Now we can use the sync manager from the application.
@main
struct SwiftDataHistoryObserverApp: App {

    let container: ModelContainer
    let roomSyncManager = RoomSyncManager()

    init() {
        container = try! ModelContainer(
            for: Room.self,
            configurations: ModelConfiguration(
                isStoredInMemoryOnly: false
            )
        )

        try! roomSyncManager.start(container: container)
    }

    var body: some Scene {
        WindowGroup {
            ContentView()
        }
        .modelContainer(container)
        .environment(roomSyncManager)
    }
}
And here is a simple view that inserts a new room.
struct ContentView: View {

    @Environment(\.modelContext)
    private var modelContext

    var body: some View {
        Button("Add Room") {
            let room = Room(
                name: UUID().uuidString,
                area: 250
            )

            modelContext.insert(room)
        }
    }
}
When the button is tapped, a new Room is inserted into the SwiftData store. The HistoryObserver notices the change, the history is fetched, and the inserted room is queued for synchronization.
This is the main difference between ResultsObserver and HistoryObserver.
ResultsObserver is useful when you care about the current results. For example, calculating totals, summaries, or derived state.
HistoryObserver is useful when you care about what changed. This makes it a better fit for synchronization, audit trails, background processing, analytics, and integrations with custom backends.
If your application only needs to display data in a view, @Query is still the best choice. If you need derived state outside the view, ResultsObserver is a good option. But if you need to synchronize local SwiftData changes with your own backend, HistoryObserver provides the missing piece.
Conclusion
The updates introduced in iOS 27 may not seem dramatic at first glance, but they address several limitations that SwiftData developers encountered in real-world applications.
Being able to filter directly on enums removes unnecessary duplication in your models. Sectioned queries make it easier to organize and present data. Compound predicates provide a cleaner way to build dynamic filtering experiences. The new .codable attribute allows framework types and other complex values to be persisted without custom workarounds. And ResultsObserver finally gives developers a way to react to store changes outside of SwiftUI views.
What I find most interesting about these additions is that they are not entirely new concepts. Developers have been asking for these capabilities since SwiftData was introduced. Apple has simply made them part of the framework, which means less boilerplate code, fewer workarounds, and cleaner application architecture.
If there is a common theme across all of these features, it is that SwiftData is becoming more practical for production applications. The framework is gradually moving beyond simple demos and becoming easier to use in larger, more sophisticated projects.
Whether you are building a personal finance application, a task manager, a mapping application, or a business application backed by CloudKit, the improvements in iOS 27 make SwiftData more flexible, more expressive, and ultimately more enjoyable to work with.
SwiftData is still evolving, but iOS 27 is the first release where many of the framework’s early rough edges have started to disappear.